Saturday 7 December 2013

Decoupage projects from the Shabby Chic course.


 The photographs are finished decoupaged pieces from the Shabby Chic class held at Waimea College.
The top photographs is a tray decoupaged with old music paper and finished with roses cut out of wrapping paper.
The face is a reversed image from a photocopy, interesting the black and white image has a green tint to it now.
The last photograph is a decoupaged tray with cut out teacups again out of wrapping paper.


Saturday 16 November 2013

Gilding or applying gold leaf

Crackled heart

Wooden candle stick gilded

Gilding in progress

Partly gilded frame


Finished candle sticks

Furniture in progress


All photographs are projects done in the Shabby Chic class at Waimea College,Nelson.
Last week we tried gilding or using imitation gold leaf, by mistake I bought copper gold leaf instead of the gold. The ladies liked the copper and I must say I love the finished work.
Also the crackled wooden heart as part of a Christmas decoration looks great..

Thursday 7 November 2013

Shabby Chic Frames


This week is a week of workshops at home. My open studio weekend as part of the Ruby Coast Art week  was success full, I sold well and had interest in my workshops of mosaic, shabby chic and jewellery making.
I really enjoy running workshops from home, because of my studio size I can only have three people max,but all my materials and equipment is in my studio and we always have a coffee break with cake of course.

Yesterday we did Shabby Chic Frames with home made chalk paints.
I like to use baking soda and plaster of paris, easy to buy at any hardware store and supermarket.
The baking soda is mixed with water and then acrylic paint is added:     6 teaspoons of baking soda.
The plaster of paris is mixed with water and then acrylic paint is added: 3 teaspoons of plaster.

I only mix enough for a frame. The consistency should be like cream and when I add the paint I stir well.
The baking soda chalk paint is gritty when applied, but can be sanded back to a smooth surface and I really like the effect of the baking soda, it gives the look of lime washed wood.
The plaster paint is chalky and had a mat finish and not easy to sand back, very durable.
I like to rub a candle on the surface first before applying the plaster paint for easier sanding.

Many different layers of paint can be applied and each layer sanded back to reveal the colour underneath.
The ladies enjoyed the workshop and have already ideas to give pieces of furniture a new make over.


Wednesday 30 October 2013

Shabby chic painting


A while ago I found an old timber picture frame with plywood backing.
First I painted the frame in off white and with my water colour sticks added different blues and greens and then sanded the frame back to reveal the colours underneath and let some of the wood show through as well.

I didn't know what to do with the plywood backing, so I started to base coat it with white paint and then used different colours paint and let the paint run. I spattered white paint on top with a tooth brush.
In a magazine I was inspired by a photograph of flower garlands, so I painted the garlands not in a realistic style, but more gave the suggestion of flowers and a bird in blue.
I also glued small pieces of fabric onto the painting.

The frame and painting are soft and feminine in colours and look very shabby chic.

Wednesday 23 October 2013

The next Shabby Chic Course: distressing furniture


The next Shabby chic course started and with ten ladies working on different pieces it will be exciting to see what the results will be.
The first night is about distressing furniture and layering paint.
The sanding is the hardest part, but after cleaning the furniture with a soft rag, the painting can start.
A candle is used to rub onto the edges of the furniture, because the wax will resist the paint and the top layer can be easier sanded down.
Many layers of paint can be applied this way and each time candle wax can be applied and the paint sanded back to reveal the colour underneath.
One of the ladies is going to paint her bathroom cabinet this way and she started with blue, next green and she likes to apply two more colours.
Exciting to see that bright colours are used, Shabby Chic doesn't always has to be in cream and white.

Wednesday 16 October 2013

Human Rights


When Henk,my husband and I worked in Cambodia in 2010 one day a little baby girl was brought into the community. She was found abandoned and her young teenage mother was infected with the HIV virus.
This little baby girl was tested for the virus and she also carried the HIV virus.
We called her Ann Marie.
I wrote another blog post about her dated back to 2010.

Why I chose Ann Marie for my blog about Human Rights is article 25 in the Human Rights:
 "Right to adequate Living Standard. Motherhood and childhood are entitled to special care and assistance. All children,whether born in or out of wedlock shall enjoy the same social protection."
Ann Marie only lived for a few months, she couldn't fight the HIV virus.
Ann Marie was born into poverty and her desperate mother abandoned her, because she couldn't care for her baby and she had no way out.

Also in New Zealand we have children living in poverty, in a country that could provide an adequate standard of living for its people.
The gap between the rich and poor is growing fast.
Why, there are many reasons. The documentary: "Mind the gap" by Bryan Bruce. http://www.youtube.com/watch?v=__2EdGFdgTA
is giving some real insights in the growing gap between rich and poor and why it is so destructive for our society.
We all have a right to an adequate living standard and one of those rights is a living wage.
All families in New Zealand should be able to buy healthy food, be able to pay for medical care and have a warm and dry house to live in.
Sadly that's not the case and like Ann Marie many children are denied the social protection we as society should give them.


.
Wednesday 9 October 2013

Impressions Art Awards


Last month I entered a National Art competition organized through the Nelson arts council and Impression Art business.
I have never entered an art competition before, so it was a lovely surprise that one of my paintings was excepted and was on show for about a month.
My painting is a self portrait with my cat, I was 20 years old and I painted this portrait of a photograph taken at teachers college when part of the curriculum was studying photography.
I have great memories of that time in my life, I don't look the same anymore on the outside,but on the inside I sometimes feel like that girl so many years ago.

Sunday 29 September 2013

Another lovely mosaic sunday


view over the estuary

tulip in my garden


Karin and I had another great Sunday enjoying our mosaic time, because of the nice spring weather we went for a walk first with my old dog phoebe.
Mapua has beautiful areas to enjoy the view over the estuary and not far from my house is this great spot to sit and look out over the water.
Its a  peaceful place and I will go back and do some sketching there.
Karin had a lot of grouting to do today, but she finished her two tiles and cup and saucer.
I worked on a little wind chime and garden stone, hope to grout those pieces tomorrow.

Karins grouted tiles

The big teacup


Saturday 28 September 2013

market


Last week I had a small stall at the local Mapua Flower festival with some of my vintage crafts.
Most of the items are made from vintage and recycled materials and I am slowly changing my vintage crafts into a more shabby chic look and mixed medium paintings.
I will be part of the craft coop in Wakefield for a few months and like to sell my crafts there over the Christmas period.

Saturday 21 September 2013

Shabby chic course: finishing


 The last night of the shabby Chic course for this term.
The end results are really beautiful and all so different.
From a recycled frame made into a nautical picture, a decoupaged and gilded mannequin, a shabby chic table with a printed image and a decoupaged and gilded angel.
These are just a few of the amazing finished pieces the ladies worked on over the last 6 weeks.
Its great to see the creativity and the individuality of the work the ladies produced and I hope they will continue making more beautiful art.

Sunday 15 September 2013

Shabby chic course: antiquing


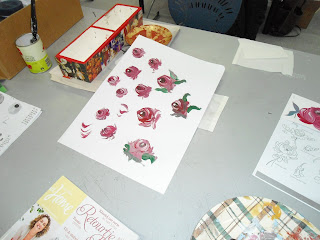
In the shabby chic course this week we did antiquing and painting 'shabby chic roses'.
Mostly I use burnt umber oil paint and odourless turps for antiquing, but  an acrylic burnt umber paint can be used thinned down with water.
The only disadvantage with a water base antiquing medium is the quicker drying time.
Another great way is to colour clear furniture bees wax with a little burnt umber acrylic paint and use this for antiquing furniture. The wax needs to be buffed up with a soft cloth.
The furniture piece doesn't need to be varnished anymore after waxing.
The "shabby chic roses" are simple folk art roses from France and looks nice painted in soft colours and sanded back to create an aged look.


Saturday 14 September 2013

Button necklaces


For the local craft group in Mapua I taught a workshop this week making button necklaces.
The group meets every Friday morning in the local community church and is going for many years.
Around nine ladies took part in the workshop and we had so many buttons to choose from and the ladies made some wonderful necklaces.
The buttons are woven onto waxed cord and the necklace can be long or short.
In two weeks time we are going to make a window art display for the Ruby Coast Arts Week in November.

Monday 9 September 2013

Spring in Mapua


Spring has come to Mapua, slowly blossom is appearing and when I am working in the garden I can hear the lambs calling out to their mums!
I think living in a village surrounded by paddocks and orchards is especially great in spring time.
Karin and I had another wonderful afternoon of making mosaic for the garden.
Karin's bird on a tile is taking shape and a stepping stone for the garden club raffle is coming along.
For afternoon tea we had a citrus slice and because Karin and a few of my friends can't eat gluten, this slice is made with gluten free flour. My lemon tree provided the spray free lemons.

                                                    Lemon slice
100 grams butter                                                    
half a cup of sugar                                                  
2 eggs                                                                    
2 cups of gluten free flour                          
2 teaspoons of baking powder                                
zest of two lemons
juice of two lemons

In a bowl beat the softened butter, flour and sugar.
In a different bowl mix the lemon juice/zest and sugar together
Pour the wet ingredients into the dry ingredients
Beat together for 2 minutes
Pour into a greased baking tin and bake for 25 minutes on 170 Celsius
Don't over bake,otherwise the slice becomes dry.

Icing:
Beat together lemon juice/ zest of 1 lemon and 1 cup of icing sugar and when slice is cooled use a spatula to spread the icing evenly.

This slice is nice served with yoghurt on the side, very refreshing.


.

Friday 6 September 2013

Shabby chic Decoupage


Decoupage looks great on furniture, boxes, old vases and many other items.
I think decoupage objects add charm to the shabby chic interior, because it evokes feelings of the past and many memories.
Not only photographs, but wrapping papers,traveling documents, postcards, music paper and serviettes can be used. The list is endless.
It was great to see the many different ideas on Wednesday night and the ladies spend the time on cutting and gluing the images.
I used PVA glue mixed with water: 2 parts of glue to 1 part of water so to speak.
Mixed well in a glass jar with lid,the glue will keep for a while.
When gluing the images onto the object its very important to brush enough glue on the back of the image and then brush glue on top of the image as well and I use my fingers to carefully spread the glue and get rid of air bubbles.
Also a damp sponge can be used to take of excess glue.
Normally ink jet copies from the photocopier are a no no for decoupage, but two ladies used ink jet copies and the ink didn't bleed when the glue was applied, so that was interesting.
Next week we will antique all the pieces done during the course and try our hand at painting shabby chic roses!
The last photograph is a decoupage icon I did a few years ago.


Tuesday 3 September 2013

Spring in Mapua


In our local park Spring is showing its beautiful colours.
Being in the southern hemisphere Spring starts on the 1 September, the day my daughter Rachel was born and it last till beginning of November when we slowly go into summer.
Spring is always a time of lovely green hills in the area I live and because Mapua is situated between apple orchards and vineyards, the blossoms of the fruit trees is just amazing and walking with my dog early evening the air is filled with blossom perfume.